How to Use HighLevel: A Comprehensive Guide for Beginners
Introduction
Are you seeking for a way to simplify complicated coding jobs and streamline your business processes?
Look no further than HighLevel. This platform that brings together the functionality of code, with the ease of drag-and-drop building.
In this manual, we’ll provide you a step-by-step explanation for using HighLevel and advice on how to get the most of it for your projects.
As a business owner or a developer, you understand the importance of efficiency and effectiveness when it comes to coding. You want to be able to complete projects quickly and accurately, without spending hours struggling with complex coding processes.
HighLevel offers the perfect solution to simplify your coding tasks and streamline your business processes. This powerful platform brings together the functionality of code with the convenience of drag-and-drop building, allowing you to quickly and easily create custom solutions for your business needs.
Whether you’re a beginner or an experienced developer, HighLevel provides you with the tools and resources you need to succeed. With its intuitive interface, you’ll be able to create custom solutions in no time, without needing to write a single line of code.
In this manual, we’ll take you through the ins and outs of using HighLevel and provide you with practical advice on how to get the most out of it for your projects. From setting up your account to customizing your solutions, we’ll provide you with all the information you need to start using HighLevel to its fullest potential.
So, whether you’re looking to simplify complicated coding jobs or streamline your business processes, HighLevel is the platform you’ve been searching for. With its ease of use and powerful features, you’ll be able to focus on what matters most – growing your business and achieving your goals.
Understanding HighLevel’s Interface
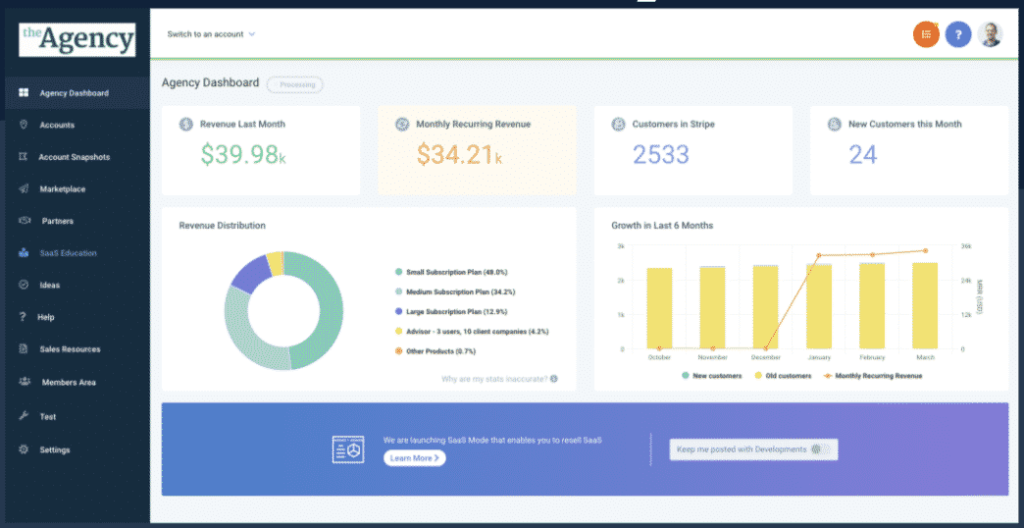
When you first log in to HighLevel, you’ll be greeted with a dashboard that displays all of your current projects. To create a new project, simply click the “Create Project” button in the top right corner.
Once you’ve created a project, you’ll be taken to the main HighLevel interface, which is composed of three main sections: the left sidebar, the canvas, and the properties panel.
The left sidebar in HighLevel is where you’ll find all of the elements that you need to build your custom solutions. From pre-made templates to individual widgets and components, everything you need to create your project is easily accessible from this sidebar.
The canvas is where you’ll be working on your projects. This is where you’ll be able to drag and drop elements from the left sidebar onto the canvas, and arrange them to your liking. The canvas also allows you to visualize your project as you’re building it, so you can see exactly what it will look like when it’s complete.
The properties panel is where you’ll be able to customize the elements you’ve placed on the canvas. Here, you’ll find a variety of options for each element, including size, color, text, and more. The properties panel also allows you to add interactions and animations to your elements, further customizing your solutions.
With these three main sections, HighLevel’s interface is designed to be intuitive and easy to use. Whether you’re a beginner or an experienced developer, you’ll be able to quickly and easily get up and running with HighLevel, building custom solutions that meet your unique business needs.
So, whether you’re looking to streamline your processes, automate your workflow, or simply simplify your coding tasks, HighLevel’s intuitive interface has you covered. With its ease of use and powerful features, you’ll be able to build the solutions you need to succeed in no time.
The Left Sidebar
In the left sidebar, you’ll find a variety of pre-made templates, widgets, and components that you can use to build your project. These elements include things like buttons, text boxes, images, and more. Each element is fully customizable, so you can make it match your brand and meet your specific needs.
To add an element to your project, simply find it in the left sidebar, drag and drop it onto the canvas, and arrange it as you see fit. You can also duplicate elements and arrange them in different ways to create complex, multi-layered projects.
In addition to the pre-made templates and components, the left sidebar also provides you with the ability to add custom HTML and CSS code to your project. This allows you to further customize your solutions and add even more functionality to your projects.
With the left sidebar, HighLevel gives you everything you need to build the solutions you need for your business. Whether you’re a beginner or an experienced developer, you’ll find the elements you need to get started, and the flexibility you need to build the perfect solution for your needs.
So, if you’re ready to get started with HighLevel, dive into the left sidebar and start exploring all of the components and elements available to you. You’ll be amazed at what you can build with this powerful platform.
The Canvas
The canvas is where you’ll design and build your project. You can arrange components and connect them to create complex workflows.
he canvas is where you can bring your ideas to life. This is where you’ll be able to see the visual representation of your project and make all the necessary changes to perfect it.
As you add components to the canvas, you can arrange them in any way you like to create your desired layout. You can also add connections between components to automate certain tasks and streamline your workflow. These connections allow you to create a series of steps that will be executed automatically when a trigger is activated.
In addition to arranging components, you can also adjust the properties of each element on the canvas to further customize your project. For example, you can change the color, font, or size of text boxes, buttons, or images. You can even add custom HTML and CSS code to further customize your project.
With the canvas, you have all the tools you need to create stunning, functional projects that meet your needs and impress your clients. So, start playing around with the canvas and see what you can create. You’ll be amazed at how easy and intuitive it is to use.
The Properties Panel
The properties panel is a crucial part of the HighLevel platform, as it gives you full control over the properties of each component in your project. By adjusting the properties, you can configure the behavior and appearance of each component to meet your specific needs.
When you select a component on the canvas, the properties panel will display all of its available settings. You can use this panel to make adjustments such as changing the background color, font size, or adding custom HTML and CSS code.
Additionally, the properties panel allows you to set up triggers and actions for each component. For example, you can set up a button to send an email when it is clicked, or you can configure a text box to display a message when a specific event occurs.
By using the properties panel, you can take your projects to the next level and create truly unique and customized solutions that meet your specific requirements.
In this chapter, we’ll cover the basics of using the properties panel and help you understand how to configure the properties of each component. With our comprehensive guide, you’ll be able to master the properties panel and take full advantage of the HighLevel platform.
Building Your First Workflow
Now that you have a basic understanding of HighLevel’s interface, it’s time to build your first workflow. In this example, we’ll create a simple workflow that sends an email whenever a new form submission is received.
- Start by dragging a “Form” component from the left sidebar onto the canvas.
- Next, add a “Send Email” component and connect it to the “Form” component.
- In the properties panel, configure the “Send Email” component with the appropriate recipient email address and message.
- Save and run your workflow to test it out.
Advanced Techniques
In this chapter, we’ll dive into some of the advanced techniques that you can use to take your projects to the next level with HighLevel. With its powerful features, you can create complex and sophisticated workflows with ease.
Some of the advanced techniques that we’ll cover include:
- Using variables: Variables allow you to store and manipulate data within your workflow, making it easier to build dynamic and data-driven projects.
- Workflow branching: Workflow branching allows you to create multiple paths within your workflow, based on specific conditions or events. This can be useful for creating dynamic and adaptive workflows.
- Using custom code: HighLevel allows you to add custom code to your workflows, such as JavaScript and HTML, giving you even more control over the behavior and appearance of your projects.
- Connecting to external data sources: You can connect your HighLevel projects to external data sources, such as databases and APIs, to build truly data-driven projects.
- Using advanced logic: With its advanced logic features, you can create complex and sophisticated workflows that can adapt to changing conditions and make decisions based on data.
These advanced techniques will help you unlock the full potential of HighLevel and create workflows that are tailored to your specific needs. Whether you’re a seasoned developer or just getting started with coding, this chapter will provide you with the tools and techniques you need to take your projects to the next level.
Conditional Logic
One of the most powerful features of HighLevel is its support for conditional logic. This allows you to create complex workflows that branch based on specific conditions.
To use conditional logic in your workflow, simply add a “Condition” component and connect it to the components you want to control. In the properties panel, specify the conditions under which each branch should be taken.
Integrations
HighLevel also offers a wide range of integrations with other popular platforms and tools, such as Zapier, Slack, and Google Sheets. These integrations allow you to easily connect HighLevel with your existing workflows and systems.
To use an integration, simply add the corresponding component from the left sidebar and configure it with your account information.
To use an integration, you simply need to add the corresponding component from the left sidebar. After adding the component, you will be prompted to configure it with your account information. This process is quick and straightforward, and once you have set up the integration, you will be able to take advantage of the full range of features offered by the platform you are integrating with.
With HighLevel, you can save a significant amount of time and effort by automating tasks such as data transfer, data collection, and even notification and communication processes. Whether you’re looking to integrate with a CRM system, a task management platform, or a project management tool, HighLevel has you covered.
In this chapter, we will take a closer look at each of the integrations offered by HighLevel and discuss how they can help you streamline your work processes. Whether you’re a beginner or an experienced user, this guide will provide you with all the information you need to get the most out of HighLevel’s integrations.
Conclusion
As a beginner, you now have a comprehensive understanding of HighLevel and its various features. This platform has the ability to take your work processes to the next level and simplify even the most complex coding jobs. With its user-friendly interface, intuitive drag-and-drop feature, and impressive range of integrations, HighLevel is poised to revolutionize the way you work. Embrace this innovative solution and experience the benefits for yourself. With HighLevel, you can streamline your work processes, automate your tasks and save valuable time that can be put to better use. So what are you waiting for?
Start using HighLevel today and take your productivity to new heights!


